- Plane Cloud: quick start without installation, focus on processes, transparency and efficiency.
- Setup in five steps: workspace, team & permissions, project, workflows/states, issues/epics/cycles.
- Flexible operating model: Cloud for speed, self-hosted for control; switch thanks to identical open-source code.
- Honicon supports with consulting, setup, templates and licenses; 14-day Business plan to test.
As part of process consulting, the question of the right tool always arises. A viable alternative here is the open-source tool. In the cloud, it can be a fast path to greater flexibility, transparency and efficiency in day-to-day work. IT professionals value Plane’s lightweight administration. The cloud version lets you focus directly on optimizing processes instead of worrying about hardware and operations.
Here are some reasons to choose Plane in the cloud:
- no installation, minimal configuration
- lower ongoing costs for updates and maintenance
- greater reliability
- instant availability and global access
Your own processes — this is the main reason why Plane Cloud is considered a suitable starting point: focus on what matters without the burden of infrastructure. Processes first, tools second. In our view, this order should always be observed for such decisions.
In a few steps to your own workspace in Plane Cloud
Depending on where you are, it only takes a few steps to start working in the cloud. Plane offers a quick start. You can jump right in or configure your working environment in detail.
Step 1: Register an account and set up your workspace
At app.plane.so you quickly reach Plane’s sign-in page. There, you can create an account with a (company) email or use services like Google and GitHub for authentication.
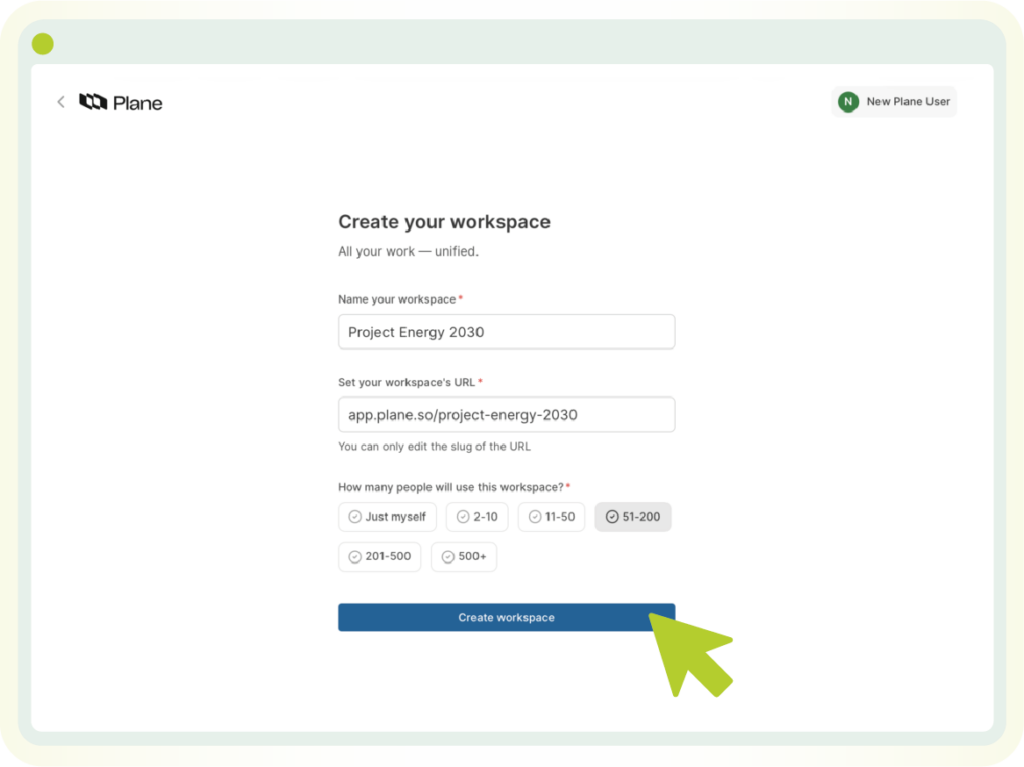
Right afterwards, create your workspace — the area where your projects, pages and more live. Here you define the name and the URL of the workspace in the cloud. The name is arbitrary and can be changed later. The URL, however, is unique and should be chosen with care.

Step 2: Define team structure and set permissions
After that, the workspace is available immediately. Now it’s time to invite the team. Click the gear icon on the left or use Ctrl+K (Cmd+K) to quickly navigate to the “Members” menu. You can invite members there. At the moment, there are Admins, Members and Guests. Members form the core group with extensive rights. The number of admins should be kept small. Guests have only limited access.
Within a workspace, you can organize into teamspaces. This feature can be enabled optionally. Anyone who wants to represent different departments in Plane from the outset should definitely use this feature, as it is very capable. At this point, the goal is just one thing: Teamspaces are ideal for managing access to various projects consistently. This way, an entire department can be granted access to 20 projects instead of assigning each member to each project individually.

Step 3: Create your first project and structure it cleanly
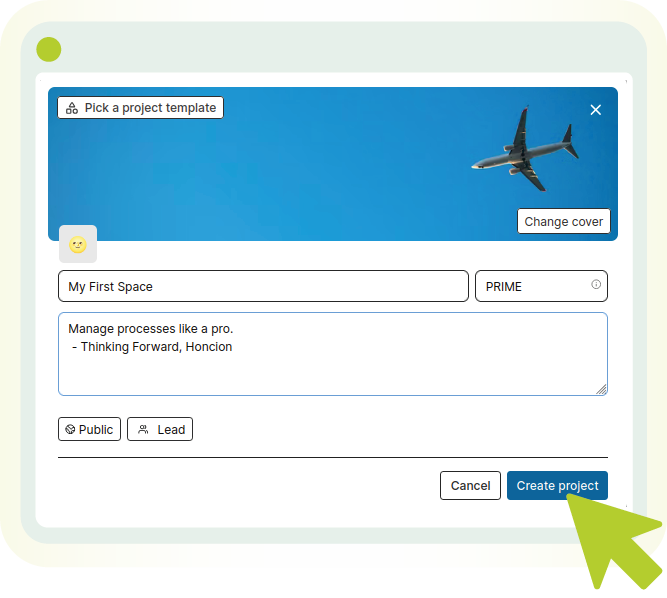
When adding the first project — as you may know from other tools — you specify a responsible person, a unique name and a short key (here: “PRIME”). This key then prefixes the tickets so they can be quickly associated with projects. A logo and banner are suggested and can be adjusted here or later.
Unlike other tools, projects can also be set to “public”. This gives users — though not the aforementioned guests — immediate access and creates transparency. If the project is not public, you obtain rights in the classic way via direct assignment or an invitation.

No matter what type of team is supposed to use a project: even in the cloud, Plane can be adapted accordingly. The features of projects are modular; you can completely disable them at the click of a button, not just ignore them.
Plane also lets you create your own templates for projects. Frequently created containers for projects can thus be set up quickly and don’t have to be configured from scratch every time.
Step 4: Configure workflows and states
Great work needs clear processes — every project needs good workflows. Plane allows custom states that fit the process exactly. A lean default covers many scenarios: Backlog, To Do, In Progress, In Review, Done. This sequence should reflect real workflows and handoffs, not just serve to sort tickets away or act as a filing system. For structuring work in the form of the “Work Items”, you can define custom fields per project, for example to show “Approved by” for the status “In Review”.
Step 5: Structure issues in epics or cycles
The last step depends heavily on the individual use case. Development teams can organize their work in sprints and use Plane’s cycles for that. Service teams can enable “Intake” for their project and thus communicate with customers who are not registered directly in Plane. Project teams can organize themselves with epics and initiatives and visualize their progress with Gantt charts.
Plane allows you to simply switch on all these functions in the cloud and thus offer the entire company structure in one tool — by staying simple enough in the right places and being powerful enough to model complex requirements for others. Various hybrid forms are also conceivable, such as a development team that works with cycles in sprints but also has direct customer contact via Intake.
Why Plane in the cloud?
Speed, stability, focus. Getting started requires no hardware, updates roll out seamlessly, additional integrations are set up quickly. Choosing Plane Cloud brings clear advantages that affect both operational and financial aspects.
Plane in the cloud plays to its strengths here: provisioning in minutes, continuous updates, seamless integration with third-party tools. Teams start without overhead; IT continues to focus on the actual work. This creates a platform that structures work, creates transparency and reliably reflects progress.
Advantages can also be disadvantages. For example, we mentioned above that global access is possible. Sometimes that’s precisely what you don’t want. Plane can also be deployed in your own infrastructure without any problems. If you don’t want to worry about your own hosting and everything that comes with it, the cloud variant is a good fit. Like many other providers, Plane relies on the services of AWS for cloud deployment. If you don’t want that, you can also choose to host Plane yourself and rely on support from Honicon.
Because the cloud version is based on the same open-source code as the on-premise version, switching hosting later (cloud to on-premise or vice versa) involves little effort. This ensures maximum future-proofing.
Unlock business features – with Honicon
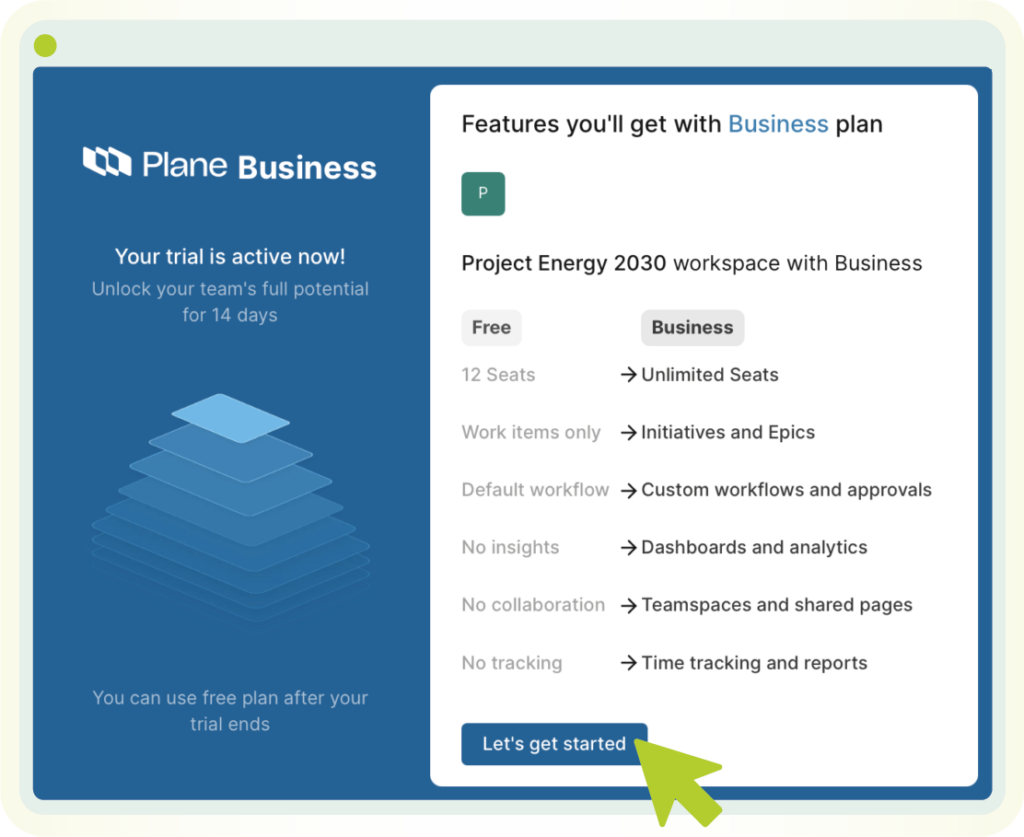
After you have created your workspace in the cloud, a Business plan is applied to it immediately, which runs for 14 days. After it expires, access naturally remains, but some features are then no longer available. With more than 12 people, Plane can unfortunately no longer be used, as the free plan is limited to that.
If you want to continue using Plane, you can count on Honicon. We support you not only with process consulting beyond the tool as well as setup and operations, but as an official Plane partner we also offer the appropriate licenses. You obtain Plane licenses directly through Honicon. For larger companies we provide centralized license management on request — and of course for smaller organizations as well.

Support and next steps
Plane is a modern, powerful and flexible tool that grows with a team’s requirements. Whether you choose the quick and convenient path via Plane Cloud or prefer full control with self-hosted operation — Honicon is your partner.
Are you ready to take your project work to the next level?
We at Honicon are happy to support you with the implementation, customization and integration of Plane into your existing system landscape.
Would you like to see a personal demo of Plane and discuss which hosting option (cloud or self-hosted) is best for your specific compliance and team requirements?
Learn more about Plane in a
free initial consultation
